Friday, February 14, 2014

DRUGSTORE BEAUTY ESSENTIALS


There are few products that I feel that I must simply have in my makeup bag. These are the tried and true, five star, work like a dream beauty products that I need to have in my makeup bag at ALL TIMES! 

1. Blistex Lip Balm 
So let me start by saying that I am currently wearing Blistex Lip Balm on my lips... right now... as I type. This stuff is amazing. I will warn you though, it does have that medicated salve-y scent to it; so if that isn't your thing, then this might not be for you. I love this lip balm though, and I actually like the scent. It moisturizes, it repairs, and if it's winter than you better believe I am putting this on every night before bed. 

2. Physicians Formula Conceal Rx 
I feel like the job of a concealer is to completely mask whatever it is that you are trying to conceal...hence the name. Nothing aggravates me more than buying a conceal that does literally less than my foundation does when it comes to coverage. If I have a blemish, I need something that is going to completely cover it, and continue covering it for the duration of the day. I don't want it melting away with the Florida heat. This concealer fits the bill! It is FULL coverage, but not too thick, and can be blended for a lighter more natural finish. It's not a one trick pony either where you can only use it under your eyes, or on your face. This is an AND product. I use it for my under eye circles as well as any blemishes/redness that I may have that day. It's one flaw is that it can settle in creases from time to time so make sure you set it with a powder and you should be good to go! A little goes a long way and you definitely get your money's worth out of this product. 

Moving right along! 

3. Rimmel London Stay Matte Setting Powder
Do yourself a favor and just go buy this product right now. It is SOOO inexpensive and does a beautiful job at setting foundation. As you can see, I have hit pan on mine and will soon be making my way back to the drugstore to pick up another because I can't go a day without it! Why spend tons of money on a powder when this one does an amazing job for a fraction of the price. Try it out, you wont regret it!


4. Revlon Colorstay 24 hr Foundation for Combination/Oily Skin
Medium/Full coverage with a beautiful finish...Isn't that what most people want in a foundation? Well this is it. Although I had taken a little break from this product over the summer opting for a lighter BB cream, I find myself reaching for it during these cooler days or want to go for the porcelain skin finish. For a girl with combination skin who lives in Florida, it is extremely VITAL to find a foundation that wont run off your face throughout a hot, humid summer day. I can always count on this foundation and actually wore it on my wedding day. 


5. Wet n' Wild Eye Shadow palette in Walking on Eggshells
This is by far the best product you will find for the price you will pay. All of Wet n' Wild's eye shadow palettes have incredible color payoff, they are velvety to touch, wear beautifully, and are SUPER affordable (not to mention they also put coupons in the paper to make it even more affordable). I use this product for my everyday makeup and have for the past year. I have hit pan but it has lasted me an incredibly long time! I will most definitely be making a trip to the store for another in the very near future! 

Well those are my Drugstore Beauty Essentials! Let me know if there is anything that will never leave your makeup bag, or if you have tried any of these products and what you thought of them! 

Until next time :)


Wednesday, February 12, 2014

MODERN TAKE ON OLD SCHOOL DESK

I’m back with another project that I have completed!


Behold my new end table! I know what you are thinking…”Is that a school desk?” Why yes, yes it is. I wish I could say that I thought of this on my own but I actually got the idea from a tour I saw on Apartment Therapy. 

I get TONS of inspiration from the house/apartment tours on Apartment Therapy.com, one of my favorite blogs of all time! Most of the time when I’m browsing through different tours, I’m making mental notes of things that I want to recreate in my own home one day. I came across a tour that I absolutely loved which ironically enough was called "Jesse's Modern Bachelor Pad." The last thing I am trying to create here is a bachelor pad... I'm just trying to convey more of a mature, put together home. But this house tour is one of my favorites. It's modern, but cozy... a hint of Scandinavian design....it is just simply GORGEOUS! 

 Photo from Apartment Therapy 

As you can see, I was inspired by this old school desk that was re-purposed into a nightstand. So when I came across an old school desk at a thrift store for $2.99... I just could not leave it behind. 


I loved that I could adjust the height of the desk to fit the low profile sofa that we have, and how I could incorporate more natural wood into the space. 

I basically just cleaned up the old desk, painted the base, removed the top and replaced it with a piece of birch plywood that I bought at Lowes. Then I just put a satin clear coat on top to protect the wood. The table top matches the Ikea Poang chair's frame perfectly and also the legs of the sofa (It's the Karlstad from Ikea).

I decided to add the geometric cut out on the top to make it easier to use the storage area underneath since the only way the end table fits in our small apartment is up against the sofa. 


It was definitely a fun project and let's face it... who can beat an end table for $15! My husband was definitely a fan of the price! 

Stay tuned for my next project! I'm going to be building a Mid Century inspired coffee table! 

Friday, January 24, 2014

MID CENTURY MAKEOVER

Remember in my last post when I said I was refinishing some old mid century modern chairs?? Well they are finally done! It took way too long due to having the flu, a cold, and a little bronchitis (insert "Ain't nobody got time for dat") but alas, they are finished!

I wasn't really in blogging mode when I made these aka I didn't take a lot of pictures but I do have a before and after and it is pretty impressive if I do say so myself! 

So, can I first start by saying that CHAIRS ARE SO FREAKING EXPENSIVE! For being the bargainista that I am, I was completely naive going into the chair buying process. The least expensive chairs I could find were at Ikea. They weren't the best quality (not saying their stuff isn't great quality, but for the price I was looking for...they just weren't). A fifty dollar chair is "apparently" very inexpensive....but then you have to buy 4 of them and suddenly you are shelling out 200 bucks for some chairs. The chairs I wanted though were not 50 dollars....they were more like $150....and that's when it gets a little hard to open your wallet! 

Luckily, I was fortunate that my mom and her fiance had some old chairs in storage that where the perfect style that I was looking for. There were four chairs and they were all the mid century modern style...but they were different styles and in pretty roouuughhhh shape. Lets just say my mom told me they had been in storage 15 years...

Now I'm hip, *cough I'm really not...cough* I read blogs and I stumbled across this beauty!
Photo from A Beautiful Mess 

A Beautiful Mess did a post on the process of painting and reupholstering some different chairs and now look at them! They are PERFECT! I decided to apply this same concept to my new, well, old chairs and I loved the way they turned out! 

 Pay no attention to the carpet in the dining room...its a rental.

Here are some close-ups if you really want to get in there and see! 


Have you started any new projects so far in 2014? If so, leave a comment and let me know! I'm always looking for new projects around the home! 

Wednesday, December 18, 2013

DIY DINING ROOM TABLE


This Stylizimo table with a twist was built for under $100 and is as easy as can be!
I also found more detailed instructions on Little Lucy Lu's blog post here. 

What You Need: 
Two Lerberg legs from IKEA- $10 each
Five 1" x 8" boards cut to 4' (I bought three 8' boards and had them cut in half)- $16 a board
Three 2" x 4" cut to a little shorter than the width of the table $6
Sandpaper
Wood Screws (I asked a Lowes Associate what length I needed)
Minwax Prestain Wood Conditioner (optional)-$11

Let's Get Started! 


1. First decide how you want to arrange the boards
2. Measure and arrange 2 x 4's on the underneath


  3. Screw 2 x 4's to wood - Two screws to each 1 x 8


4. Flip over and sand everything until smooth (this takes some time and patience!)
Make sure you wipe all of the wood dust off THOROUGHLY with barely damp rag


5. Add a coat of Pre-Stain (this is optional)


6. Paint on stain (I used two coats)
7. Wait for stain to completely dry


8. Assemble Lerberg Legs


9. When stain is completely dry, lightly sand with 220 grit sandpaper, wipe away dust thoroughly and paint on clear coat 

10. When clear coat is completely dry, lightly sand with 220 sandpaper, wipe down and apply another coat of clear coat. (I did this 3 times)


11. When top is COMPLETELY dry, flip table and repeat process on the bottom side
This doesn't need to be perfect because no one will really see it. 
I only did one coat of the clear gloss for the bottom.

This is the finished product!


I absolutely love this table and I also enjoyed making it! Give it a try and let me know how it works out for you! 

My next project will be some refinishing some mid-century modern chairs! 


Monday, December 16, 2013

BUILDING A DINING TABLE?!?

I enjoy creating things. Whether it is painting, ceramics, drawing, building, makeup, crafting or decorating; nothing gives me quite the thrill of completing a project and knowing that I made THAT! (whatever “that” might be)

As I have mentioned before, my husband and I are newlyweds! (We are going on 7 months now!!) This means for us that we have quite a bit of hand-me-down furniture which we are very thankful for …..but that "we" (mostly me…my husband doesn't care about decorating) want to slowly replace with things that are more our style.

So what am I working on now?! I built a Dining room table!! You might be asking yourself why I decided to tackle this project.

I'll start by saying that my husband is an EXTREME saver. I LOVE this about him… but that typically means that I have to bargain shop to find the things I "want" and don't "need." This isn't a big deal because I LOVE
bargain shopping, but dining room tables are EXPENSIVE, especially if you want quality. So naturally I decided to build one!

 I got the idea from a blog. (No big surprise there!) Which blog? Stylizimo…and you can find the post right here.

I loved the look of this table and how easy it would be to make. I mean, I have never built a piece of furniture before… so convincing my husband that I could make this was a little easier with this simple design.

I did alter it a little though because I wanted the stain on the table top to be a dark espresso color.

I will be doing a separate blog post to go more step by step on how I built the table but here is a sneak peak of the finished product!


I would definitely give this a try if you are looking for a table or desk and want more of a beginner's project!

Let me know what you think!

Thursday, November 7, 2013

MY ACNE FIGHTING DREAM TEAM


So remember in my last post when I mentioned that my skin use to be really bad? Well I decided I would do a little blog post to tell you my journey into clearing up my problematic skin. 

Now as we all know, everyone’s skin is different and although some things might work for me, it is not guaranteed to work for everyone; but if you have a similar skin type and you are currently struggling with blemishes, perhaps some of these suggestions might work for you! 

So first things first, we must address what kind of skin that I have! My skin normally tends to be normal to combination, although in the winter my skin does get a few dry spots. Back in February of this year my skin was as terrible as ever and my wedding was only 3 months away. I went on a search for something to clear my skin up before my wedding day. I was a girl on a mission and nothing was going to stop me from getting the smooth skin that I wanted (Plus I didn't want to worry about my skin while on our honeymoon! No one wants to conceal blemishes when you are soaking up some sun).

 I did a ton of research, asked all of my friends what their skin regimes were and went to town sampling tons of different ways to clear my skin up! I started with my makeup brushes. I know everyone always says you need to clean your makeup brushes at least once a week…but let’s be honest… who has time to do that? With school, work and wedding planning my days were already crammed full! Although you might feel like it can be something you can put off, think about all of the product and bacteria getting built up on your brushes from daily makeup applications, touch ups, contact with blemishes…it starts to look pretty gross pretty quickly! Find the time, and do it! I promise it makes a world of difference!


 I got a little crazy and was washing the brushes I used on my face once a day, but if you are using great acne fighting products and can’t figure out why you are still breaking out, give your brushes a wash and see if that helps! I just gently washed my brushes with a little dish soap (it kills bacteria and cuts through oils and grease) and let them dry overnight. That’s step one.


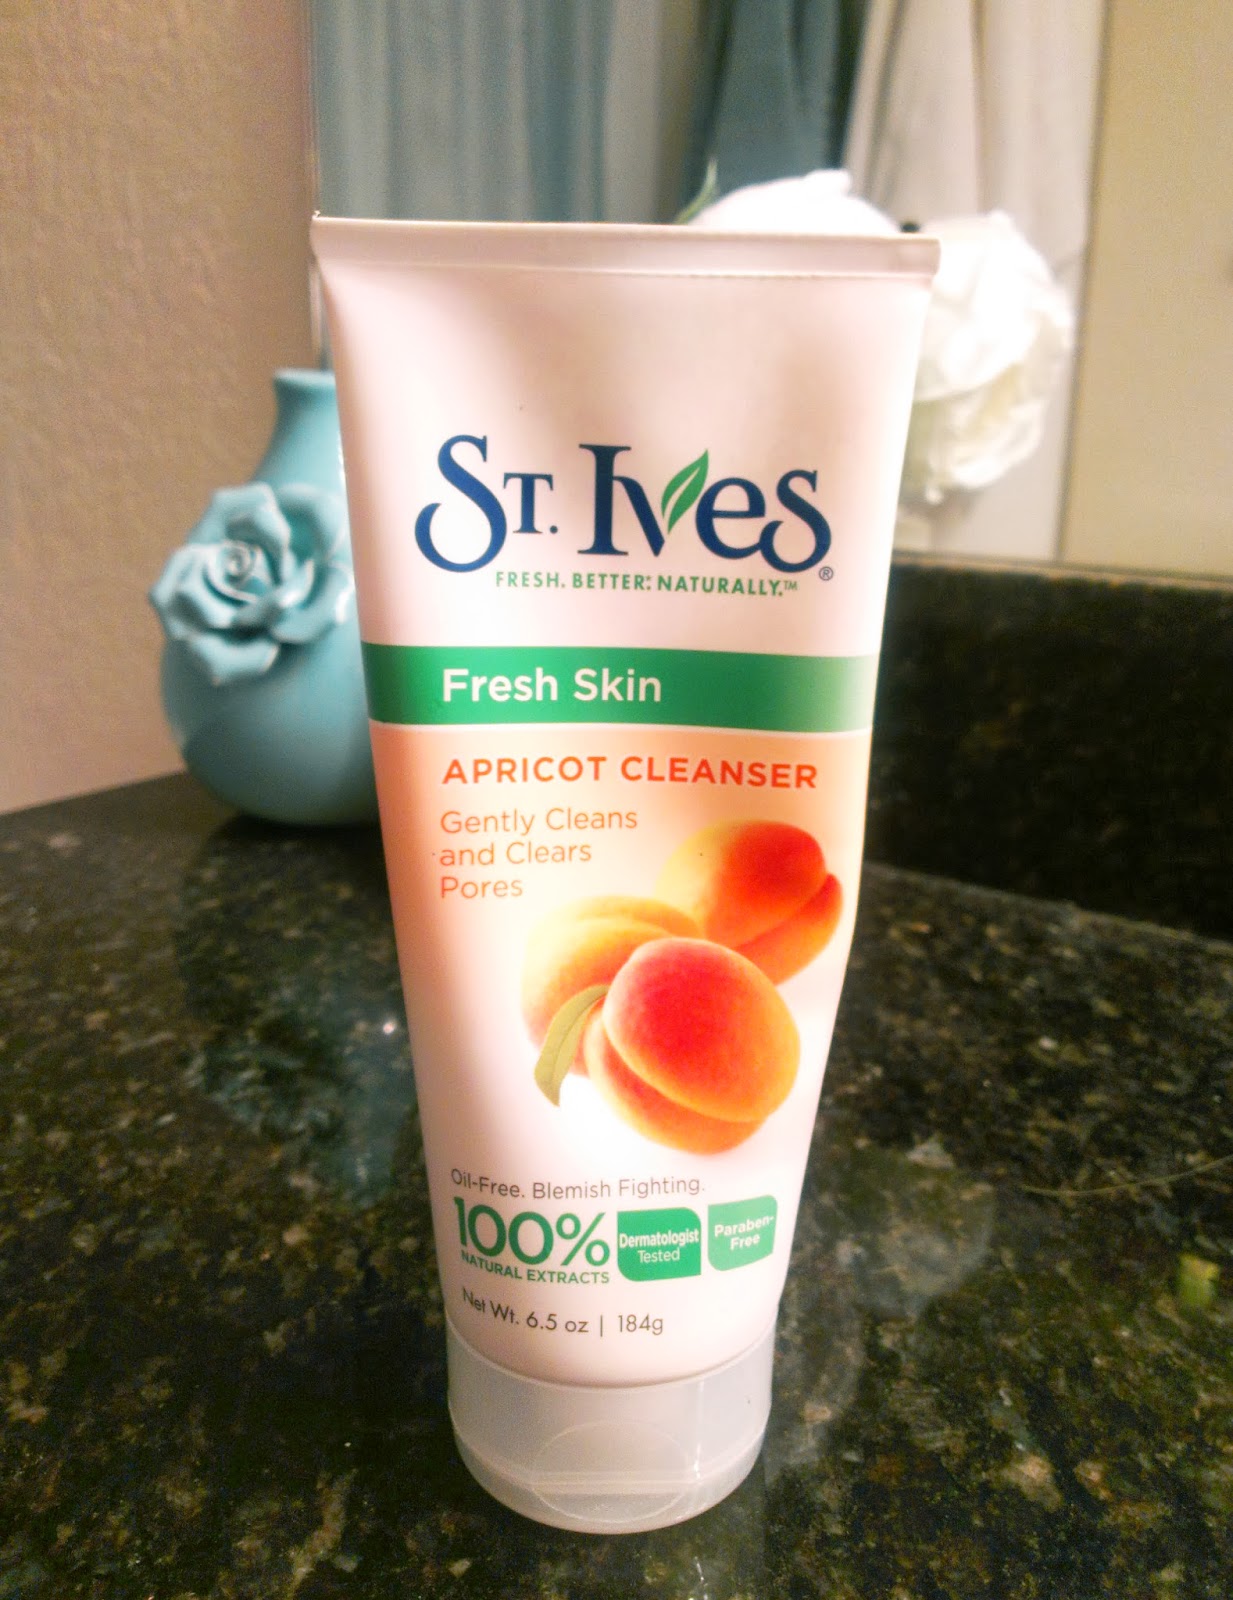
 The next thing I did was research some of the best drugstore acne fighting products. The two that ended up working for me were the St. Ives Fresh Skin Apricot Cleanser and the Neutrogena Rapid Clear Acne Defense Face Lotion.


 First let’s talk about this Cleanser. Do not get it confused for the Apricot Face Scrub! These are not the same thing! The Fresh Skin Cleanser is not as abrasive on the skin as the scrub, does a great job getting rid of all of your makeup and gets your skin nice and clean. Don’t get me wrong, the scrub is also nice, but I have found that if I use it every day my skin becomes sensitive.The Apricot Face Cleanser can be a little hard to find though. I've had most of my luck finding it at Walmart. Most other stores I have found only sell the face scrub.


 Now the real star of this blog post is really the Neutrogena Rapid Clear Acne Defense Face Lotion. This stuff is the bomb.com. (Yes, the 90’s called and I know they want their phrase back…but they can’t have it!) This stuff changed my face for the better! I loved it so much, I went on to Amazon (where I didn't even purchase it) just to write an amazing review about it. I found this product after typing into Google “Best drugstore acne fighting products” and the common denominator for all of the lists seemed to be this product. I went to Ulta and picked it up and have used it ever since! As you can see, my product is looking a little empty and that’s because it is. I need to go purchase another (this is already number 2 for me). It says that “visibly reduces breakouts in 8 hours”…and I don’t know about that, but I saw an improvement the next morning after using it. I put this on morning and evening after washing my face and all of my current breakouts cleared up and no new blemishes were forming! It was incredible! It does take a little time for the dark marks from previous problem areas to disappear, but in due time they start to fade. 


 I have used these products religiously since discovering them and as I type, there is not one blemish on my face! In case you were wondering, my face was perfectly clear until the morning of the wedding, and I woke up to one little spot. It seems that things always work out that way, am i right? That's the beauty of makeup though! 

Anyways, I hope if you decide to try these products that you find them as helpful as I did. I definitely went through a couple brands of cleansers and moisturizers to find this power team but alas! Here they are! Leave a comment letting me know if you have tried these products and your thoughts on them, or if you have found a bomb.com product that you couldn't live without! I’m always looking for new products to try! 

 Thanks for reading!

Friday, November 1, 2013

NEW DRUGSTORE FINDS

I went to the drugstore recently and picked up a few beauty products that have quickly made it into my everyday makeup bag so I thought I would share.


I recently ran out of the concealer that I had been using which was the Physician's Formula Concealer Rx. Don't get me wrong! I would definitely pick this concealer up again! If you need something covered, this will do the trick. It is maximum coverage and covers any imperfection beautifully... but I wanted to try something different.

 Whenever I buy drugstore makeup where I can't try the product before taking it home, I check out Youtube first to get some reliable reviews. Fleurdeforce did a Best and Worst Drugstore Concealers video on her channel, so I watched it and found the perfect thing!


Sonia Kashuk's Hidden Agenda Concealer Kit, which is available at Target, looked like the perfect product for multi-purpose use! It is a small quad palette that holds a light colored concealer, a darker peachy colored concealer, a more olive colored concealer and a powder to set it with. These colors are perfect countering redness (the olive concealer) and dark circles under the eyes (peachy concealer) and any other blemish you might want to cover up. They are creamy and super blendable, and all for a pretty good price considering you are getting four concealers for the price of one! These little beauts cost around $10 dollars at Target, but because I am a bargain hunter, I found one that was slightly damaged and therefore marked down half price! Quite a steal if you ask me!


Remember the bargain hunter part? Check this out! I also had a coupon for $3 off of any $15 dollar or more purchase... and with the concealer I wanted marked down, I just HAD to pick up another product. So I was looking around the little section, and although I don't normally wear lipsticks, I thought this might just be the perfect opportunity to pick one up and try it out! I picked up the Nude Pink, not wanting to jump into anything too bright too fast and I might now be a converted lipstick wearer!
This lipstick is absolutely GORGEOUS on! This satin luxe lipstick is a beautiful nude that is super creamy, smells lovely, and wears beautifully. PLUS it has SPF 16 in it...  What more could you want??


The last thing I picked up in the cosmetics department was the Garnier Skin Renew Miracle Skin Perfector BB Cream. Now I am normally a medium to full coverage kind of gal. I have tons of freckles which I don’t love, uneven skin tones and I’m normally sporting a blemish or two so I try to cover all of these things in one fell swoop of foundation. BUT lately my skin has been clearer (that’s a topic for another blog post!) and I’ve wanted to wear something that feels a little lighter but I’ve always thought that BB creams wouldn’t offer enough coverage for me. Well well well… I found the perfect thing! This BB cream is light AND has quite a bit of coverage! I picked this up from Target as well and it was about $11 dollars. Not too shabby seeing as though a little goes a long way and you get 2 fl oz compared to Revlon ColorStay’s (my other staple) 1 fl oz which is roughly the same price.


The last new gem I have been obsessing about is Dove’s dry shampoo. If you have tried other dry shampoos, you are probably aware that they don’t always make your hair FEEL clean, or smell clean for that matter! Then there is that awful white residue which…don’t get me started… This stuff is UHHHMAAZZZINNNGG!
It smells lovely, doesn’t leave that nasty residue and does the job without making your hair feel heavy and weighed down with product! A+ in my book!

Anyways, I hope if you are looking for any of these types of products, these reviews have helped!

Until later!